VIDEO TUTORIAL
TUTORIAL WITH IMAGES
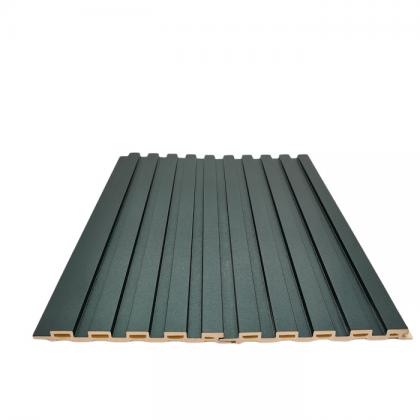
Click to go:How to Install WPC Wall Panels:Step-by-step Tutorial
TEXT TUTORIAL
1. To check the flatness of the wall
(1) Before installation, first observe whether the wall surface is flat.
(2) If the wall surface has concave or convex areas, flatten the convex areas before installing the wall panel.
(3) If the wall surface is inclined and uneven, install the wall stud first, and then install the wall panel.
2. Wall panel installation
(1) Cut all wall panels to match the actual wall height, and use an electronic level meter to position the installation wall. Use a carpenter's ink marker to make vertical lines.
(2) Cut the tongue on the first panel.
(3) Apply structural adhesive to the panel and place it on the wall.
(4) Check the alignment and fix the panel onto the wall.
(5) Insert the stainless clip into the groove on the wall panel and secure it with a self-tapping screw or a steel nail gun.
(6) Each 2.8-meter-high wall panel should be fixed with 4 to 5 stainless steel clasps, with a spacing of 50 to 60 centimeters between each two clip.
(7) Connect the male and groove of the other wall panel.
Always check the alignment and make sure the panels are securely fixed to the wall.
3. Pictures wall panel installation
(1) Put the picture's wall panels together on the ground and check their dimensions.
(2) Cut the remaining edges of the wall panels.
(3) Install the picture's wall panels on the wall and fix them in place.
4. External Corner installation
(1) Cut the wall panel tongue and cut the groove in the back of the wall panels with an electric router, according to the position of the external corner on the wall.
(2) Apply structural adhesive to the groove.
(3) Bend the wall panels to fit onto the external corner area.
Alternatively, use a 25-millimeter exterior corner trim or L-type aluminum trim to cover the external corner position.
Always ensure proper alignment and securely fix the wall panels and trim in place for a professional and finished look.
5. Ceiling Cornice line installation
(1) Cut the corner line to a 45-degree bevel angle according to the size of the corner position.
(2) Put the corner lines together and ensure they fit snugly.
(3) Fix the corner line in place on the wall panel using a marking cart.
(4) Install the cornice line.
Always ensure proper alignment and securely fix the corner line and cornice line in place for a professional and finished look.
6. Pictures moulding line installation
(1) Cut the molding lines of the spray frame into 45-degree bevels according to the layout.
(2) Put the molding lines together.
(3) Install a special buckle on the wall panel.
(4) Install the spray picture frame.
Ensure proper alignment and securely fix the molding lines and spray picture frames in place for a professional and finished look.
7. Decor moulding line installation
(1) Count the decor molding lines according to the layout and cut them into 45-degree bevel angles.
(2) Put the decor molding lines together.
(3) Install a special clasp on the wall panel.
(4) Install the motor line frame.
Ensure proper alignment and securely fix the decor molding lines and motor line frame in place for a professional and finished look.
8. Waist line installation
(1) Cut the waistline into 45-degree bevel angles according to the position of the corner.
(2) Put the waistline pieces together.
(3) Install a special buckle on the wall panel.
(4) Install the waistline.
Ensure proper alignment and securely fix the waistline and wall panel in place for a professional and finished look.
9. Skirting line installation
(1) Cut the skirting line into 45-degree bevel angles according to the size of the corner position.
(2) Put the skirting line pieces together.
(3) Install a special buckle on the wall panel.
(4) Install the skirting line.
Ensure proper alignment and securely fix the skirting line and wall panel in place for a professional and finished look.
Email : [email protected]
Factory Add: No.10, Hejia Road, Yanghe Town, Gaoming District, Foshan City,Guangdong, China